Section 1: Threshold
Installing Exterior Door Sweep
Tools needed:
- Pencil
- Measuring Tape
- 1⁄8 inch Drill Bit
- 9-18v Power Drill
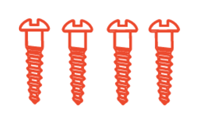
- Door Sweep Screw Package

 Masking Tape

 Masking Tape
Measure, mark, and trim door bottom sweep to fit width of door, allowing clearance between the two stops.
Measure the length of your door. Mark that length on the door sweep.
The door sweep requires clearance between the door and frame. Make sure to leave a little extra space on each side to accommodate this.
Close your door, make sure the Sweep won’t brush up the door jambs once installed. Place Door Sweep on door in a leveled position. Tape in place.
Take Door sweep and line it up with drilled holes. Tape in place with masking tape so unit does not move.
Once the sweep is taped in place, take the power drill with Phillips head attachment.
Drill in screws into each pilot hole slowly. Drill until screw heads are nearly flesh with door. Once screw stops turning, stop drilling. Do not strip the screw

With door closed, depress and hold sweep in closed (down) position. With supplied screw, attach nylon cam to door stop on latch side of door opening. Cam should be 1-3/8” (35 mm) above threshold and up against the sweep. When door is closed, the cam will hold the sweep in closed (down) position.
When door is opened, the sweep flips up to allow clearance over carpet.
After you have installed Haven, you have the option of weatherizing the unit so that it last many years. We would advise that you take the extra time and resources to do so. Haven has been design to withstand a ton of punishment, but that doesn’t mean the area surrounding Haven will be able to survive years of use, especially in a moisture-heavy environment like a front door threshold.
The primary enemy for Haven and your front door area is Moisture. We need to make sure any gaps in the flooring are filled so no moisture can get into your subfloor. Moisture can cause warping and will degrade the strengths of your flooring. In other words, moisture is very bad.
In addition to protecting your floor and subfloor, we will also walk through protecting your Haven lock itself from excessive moisture and salt (for all you snowbirds).
Use of this guide at your own risk. Haven Lock Inc. and its parent or partner companies are not liable for any damages to property or bodily injuries that occur during or after installation. Haven Lock Inc. assumes no responsibility in providing the correct tools and accessories needed for installation unless otherwise noted. Use proper protective gear when completing the steps detailed in this guide. This guide is simply suggestive and not in any way authoritative. Always use your own best judgement. Incorrect installation or lack of safety precautions can lead to serious injury or death for you or anyone around the installation area. If you are not comfortable installing Haven Lock, we advise you to seek out a professional skilled worker with home construction experience to assist you.
By clicking the box below, you are confirming you have read and understand all the terms, conditions, and safety warnings of HAVEN Lock products.
I agree to these terms, let me get to work!